> ## Documentation Index
> Fetch the complete documentation index at: https://docs.pulseairtest.com/llms.txt
> Use this file to discover all available pages before exploring further.
# Viewing tests
After your Pulse tests have been uploaded or imported into Pulse Online, you can view them using the *View Test* button.
## Results tab
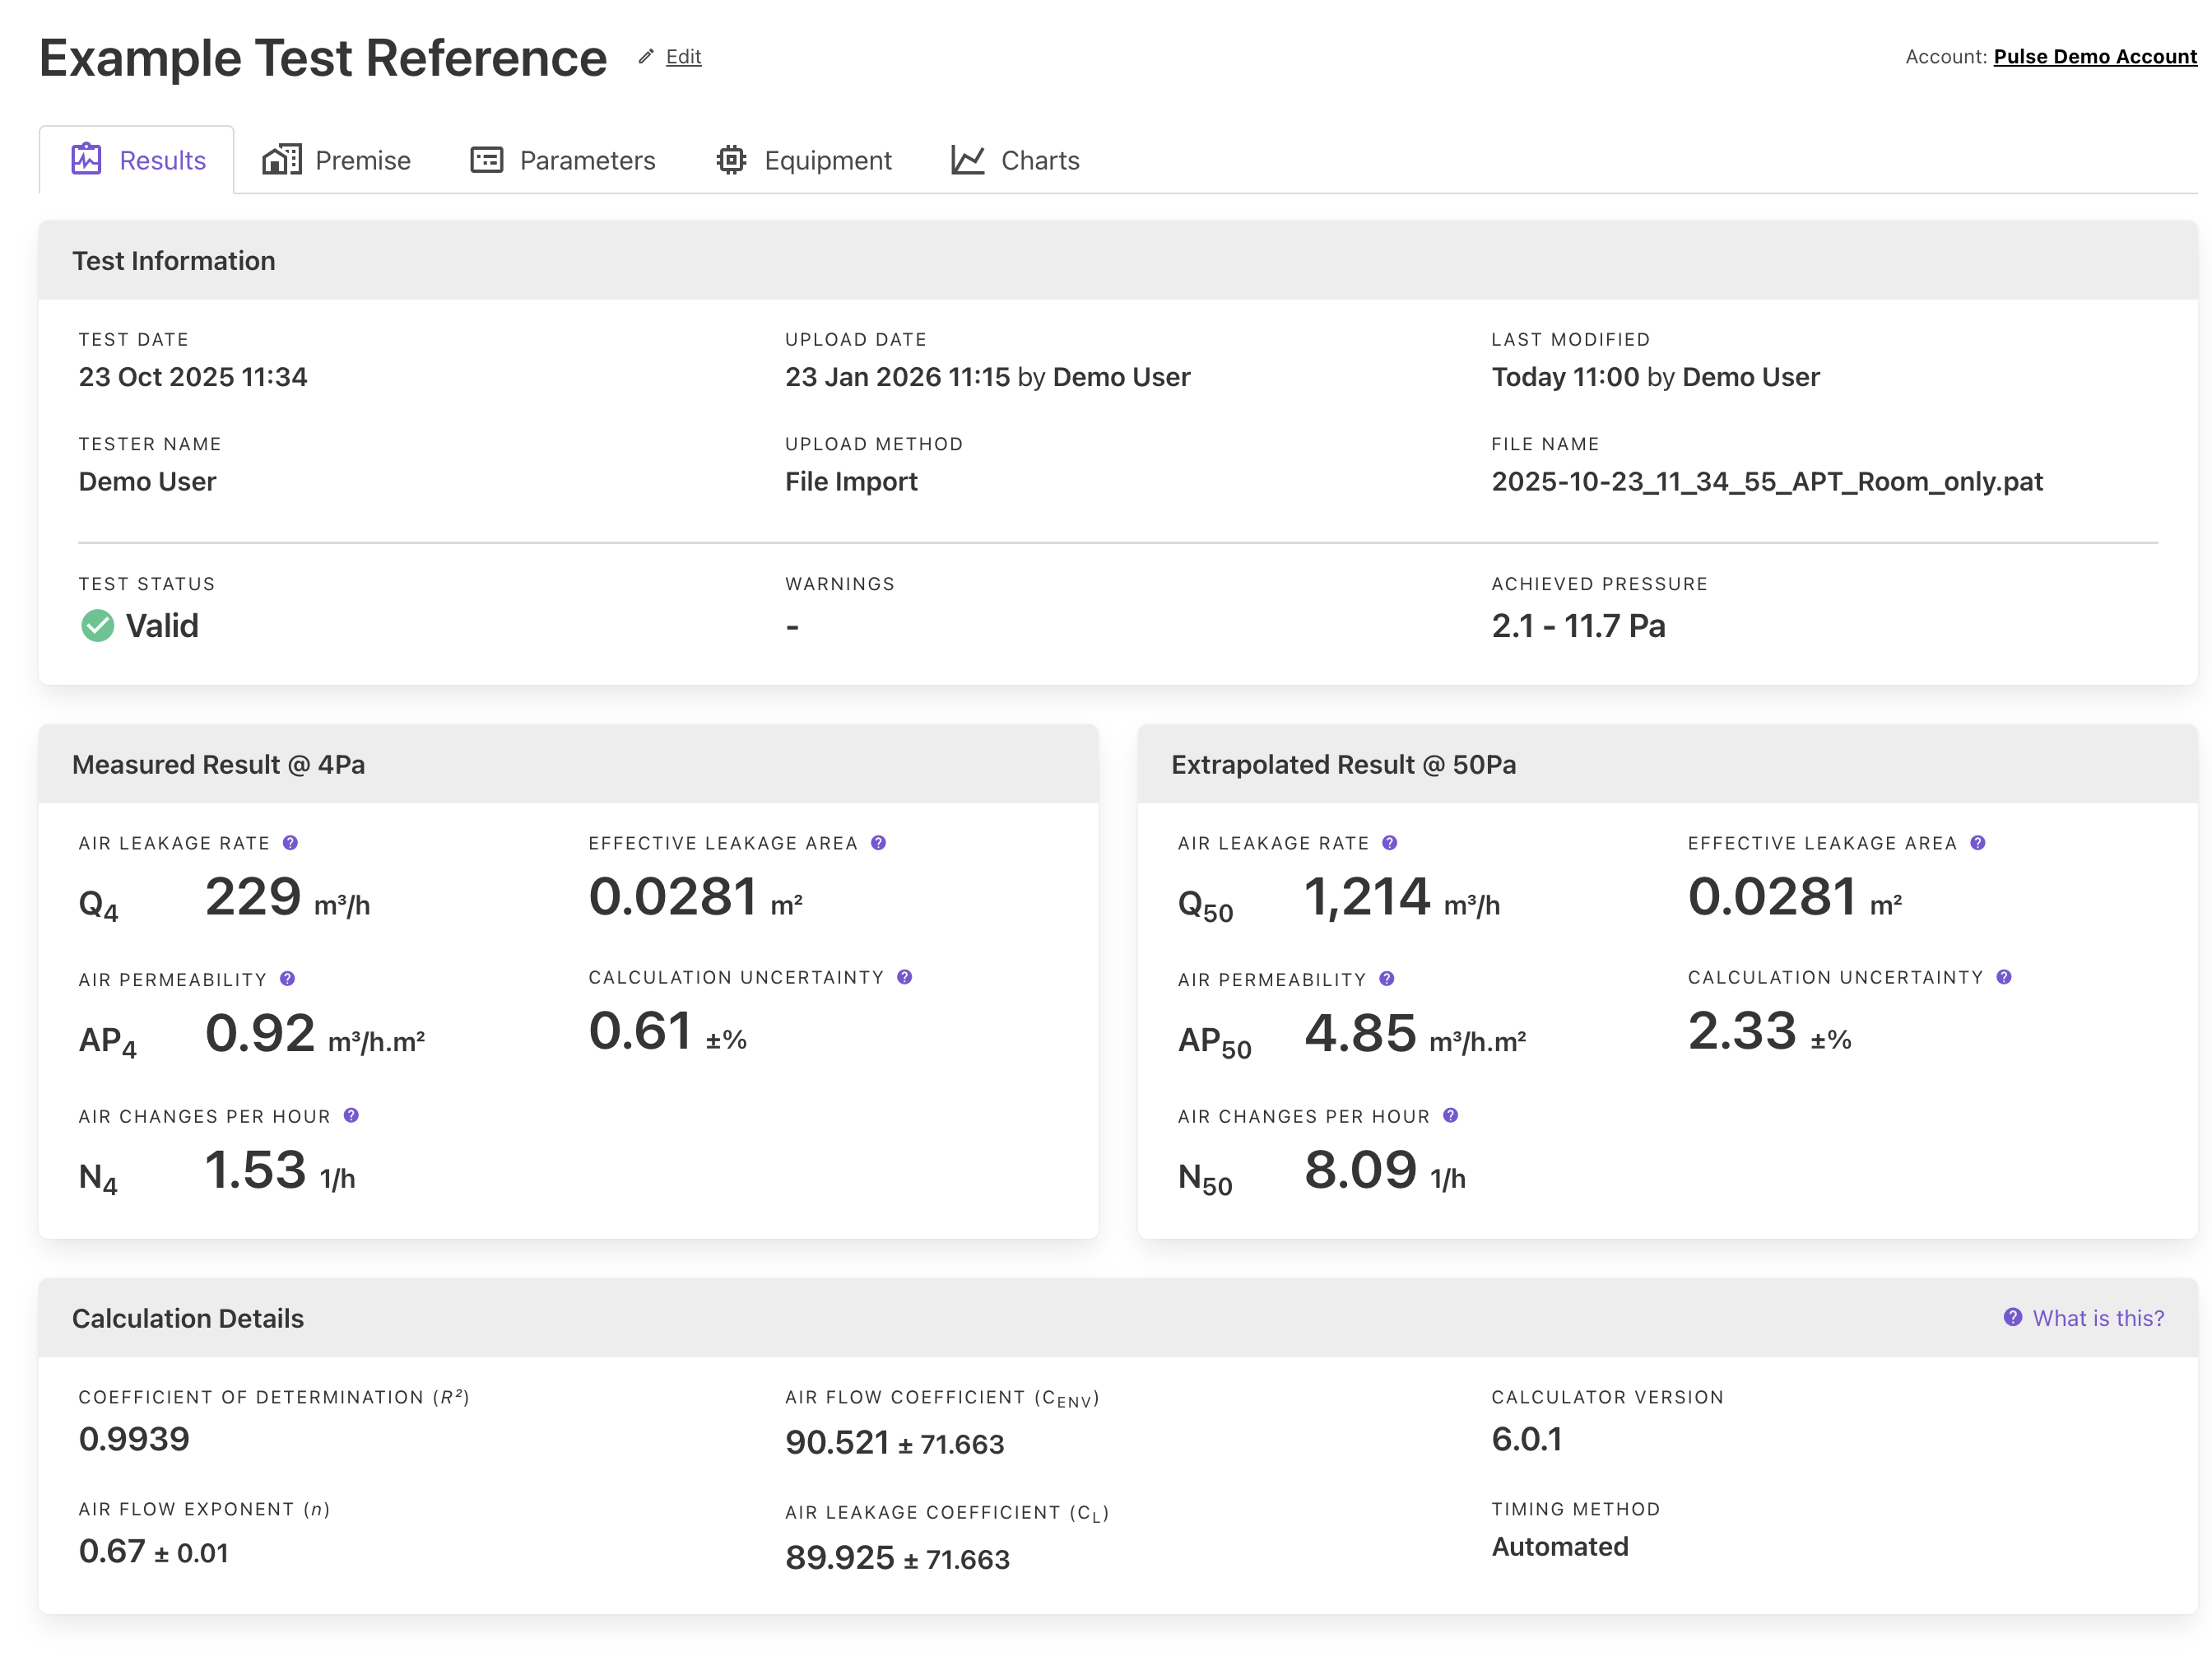
The *Results* tab shows an overview of the test result including when the test took place, who carried out the test and the outcome status.
The actual measured airtightness result is presented at 4Pa for each of the results metrics.
Additionally, the result is also presented at a pressure difference of 50 Pa by extrapolating it using a conversion factor.
 It is not possible to edit any aspect of the pressure and flow data recorded on-site by the Pulse equipment.
Only certain contextual information such as why the test was performed, building details and enclosure dimensions can be edited.
### Editing test context
The *Results* tab also contains contextual information about the test and why it was performed.
This allows you to define the test type as well as other important information required for reporting or auditing purposes.
Whilst the contextual information has no bearing on the test result, it does add richness to the data and provides a valuable reminder for yourself in the future.
It is not possible to edit any aspect of the pressure and flow data recorded on-site by the Pulse equipment.
Only certain contextual information such as why the test was performed, building details and enclosure dimensions can be edited.
### Editing test context
The *Results* tab also contains contextual information about the test and why it was performed.
This allows you to define the test type as well as other important information required for reporting or auditing purposes.
Whilst the contextual information has no bearing on the test result, it does add richness to the data and provides a valuable reminder for yourself in the future.
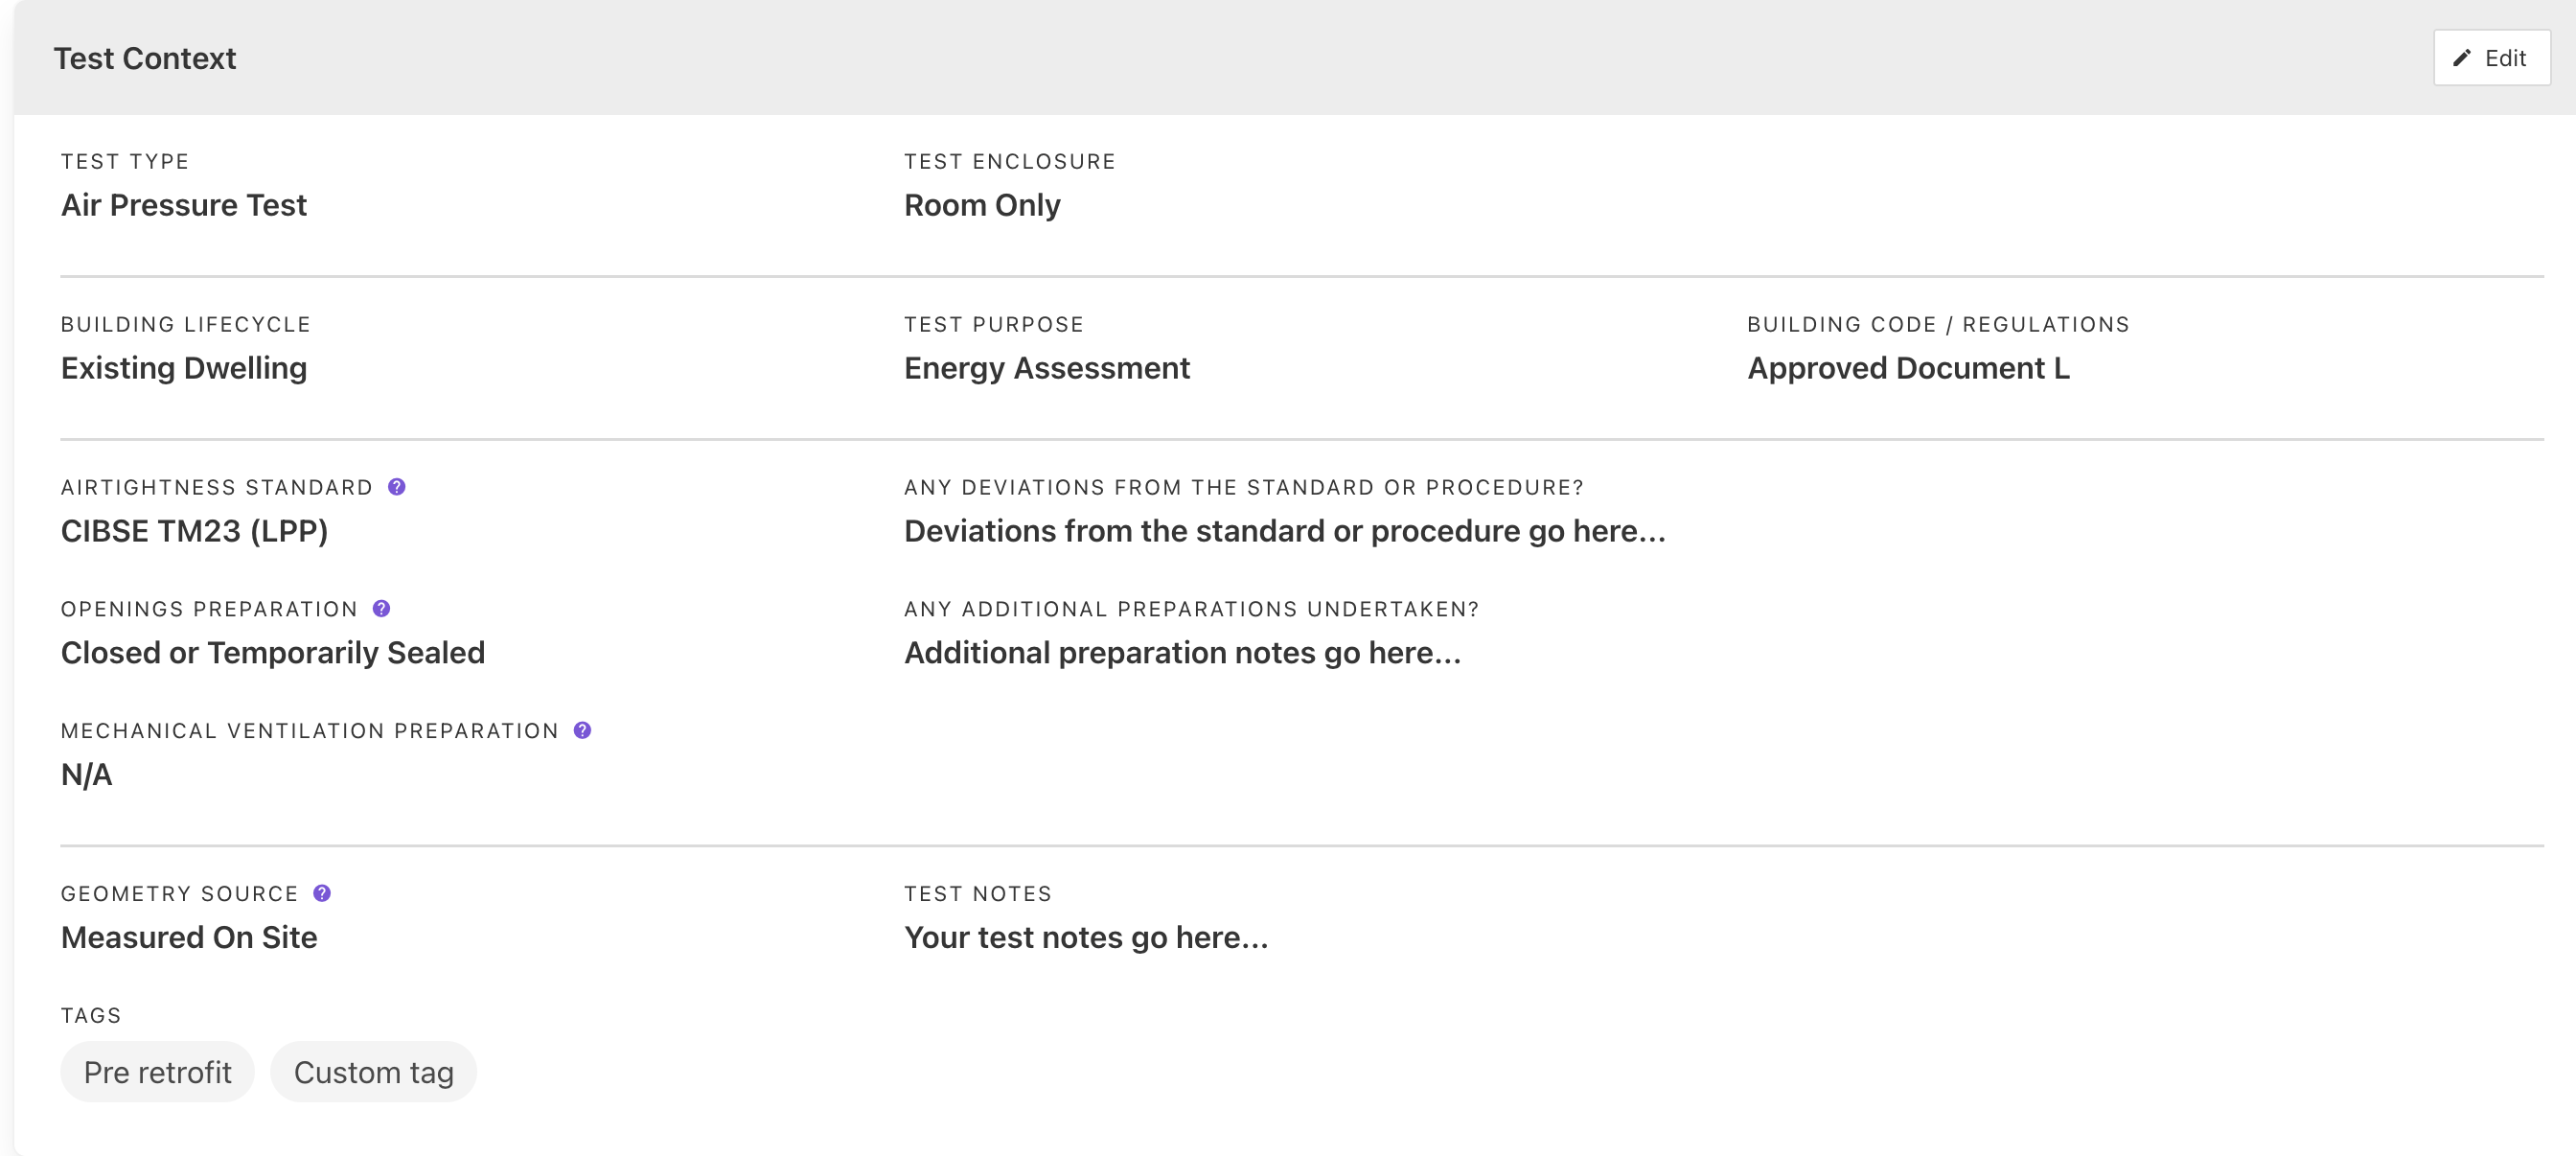 The *Test Context* can be amended by clicking the *Edit* button in the top right corner of the panel.
Once you have made changes, remember to click the *Save* button to update the test record.
We recommend completing as much of this information as possible whilst on-site using the context screen on the controller.
## Premise tab
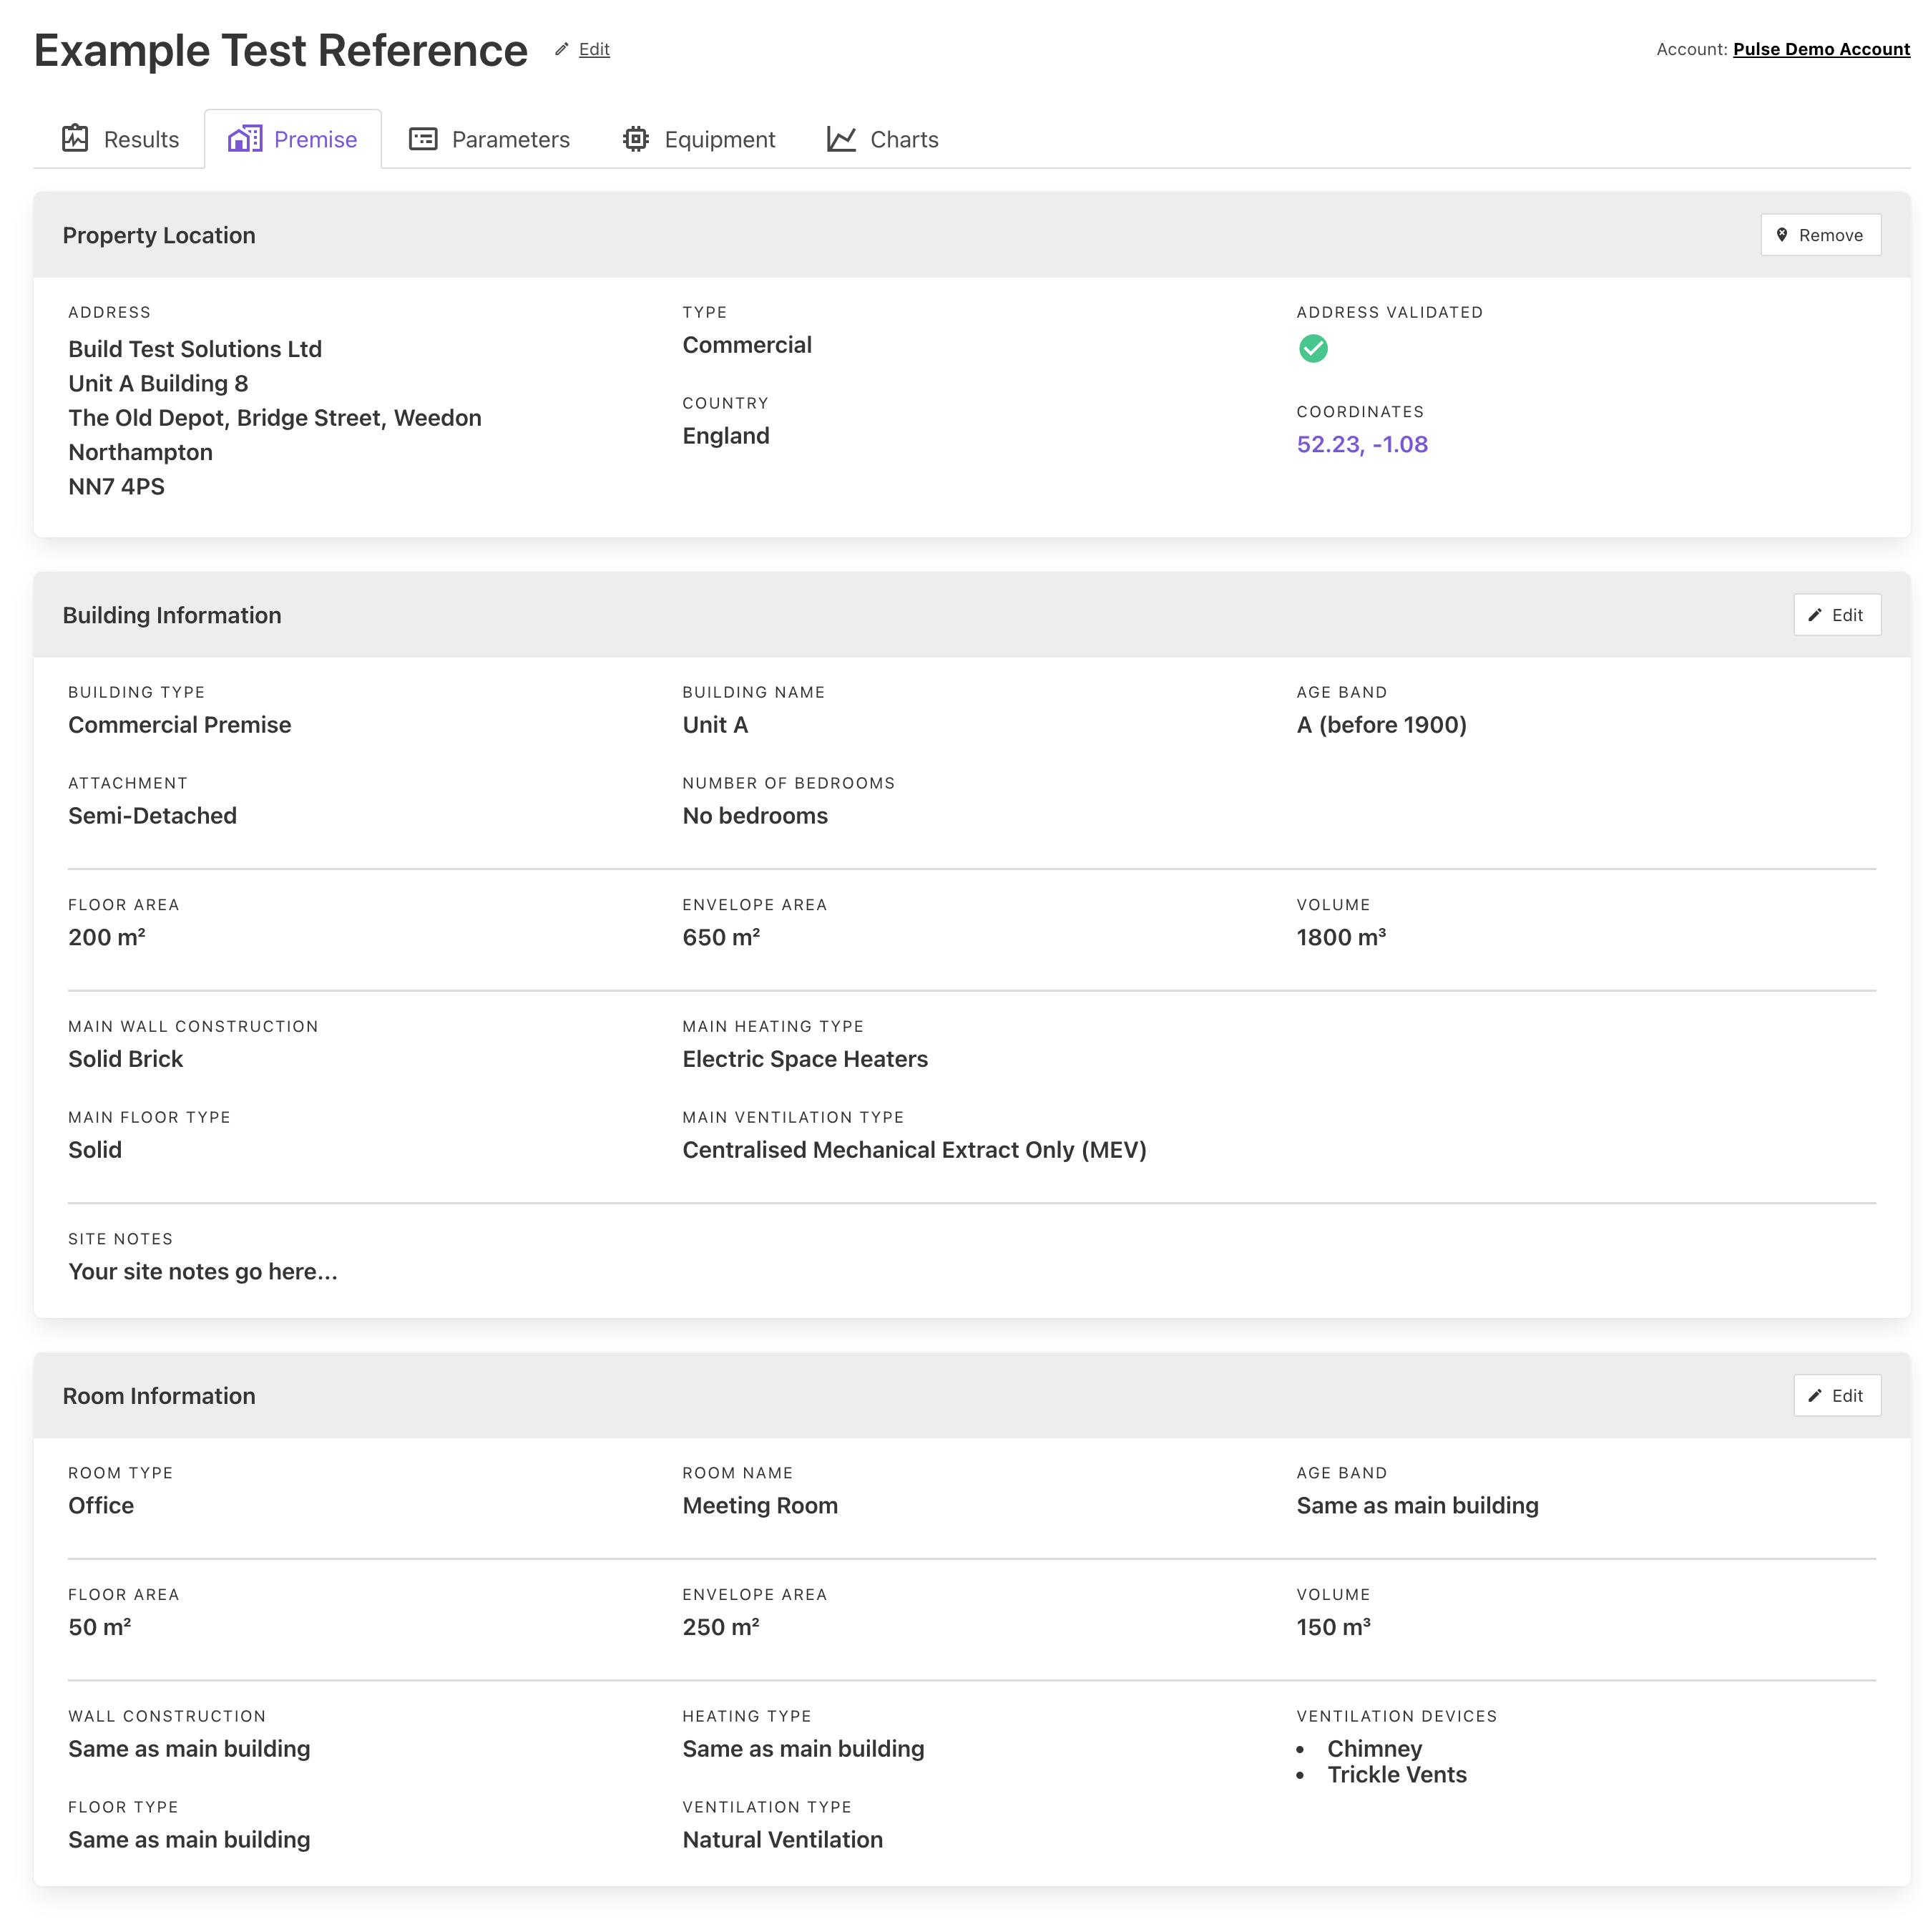
The *Premise* tab contains the location of the property that was being tested as well as information about the building in question.
If this was an individual room test only, you will also have access to the room information.
The *Test Context* can be amended by clicking the *Edit* button in the top right corner of the panel.
Once you have made changes, remember to click the *Save* button to update the test record.
We recommend completing as much of this information as possible whilst on-site using the context screen on the controller.
## Premise tab
The *Premise* tab contains the location of the property that was being tested as well as information about the building in question.
If this was an individual room test only, you will also have access to the room information.
 ### Adding a property address
If you haven't already assigned a property address to the test, you can add one by either looking up the address or manually entering an address.
A property address must be assigned before either a test report can be produced or a test certificate created via a competency scheme.
#### UK address lookup
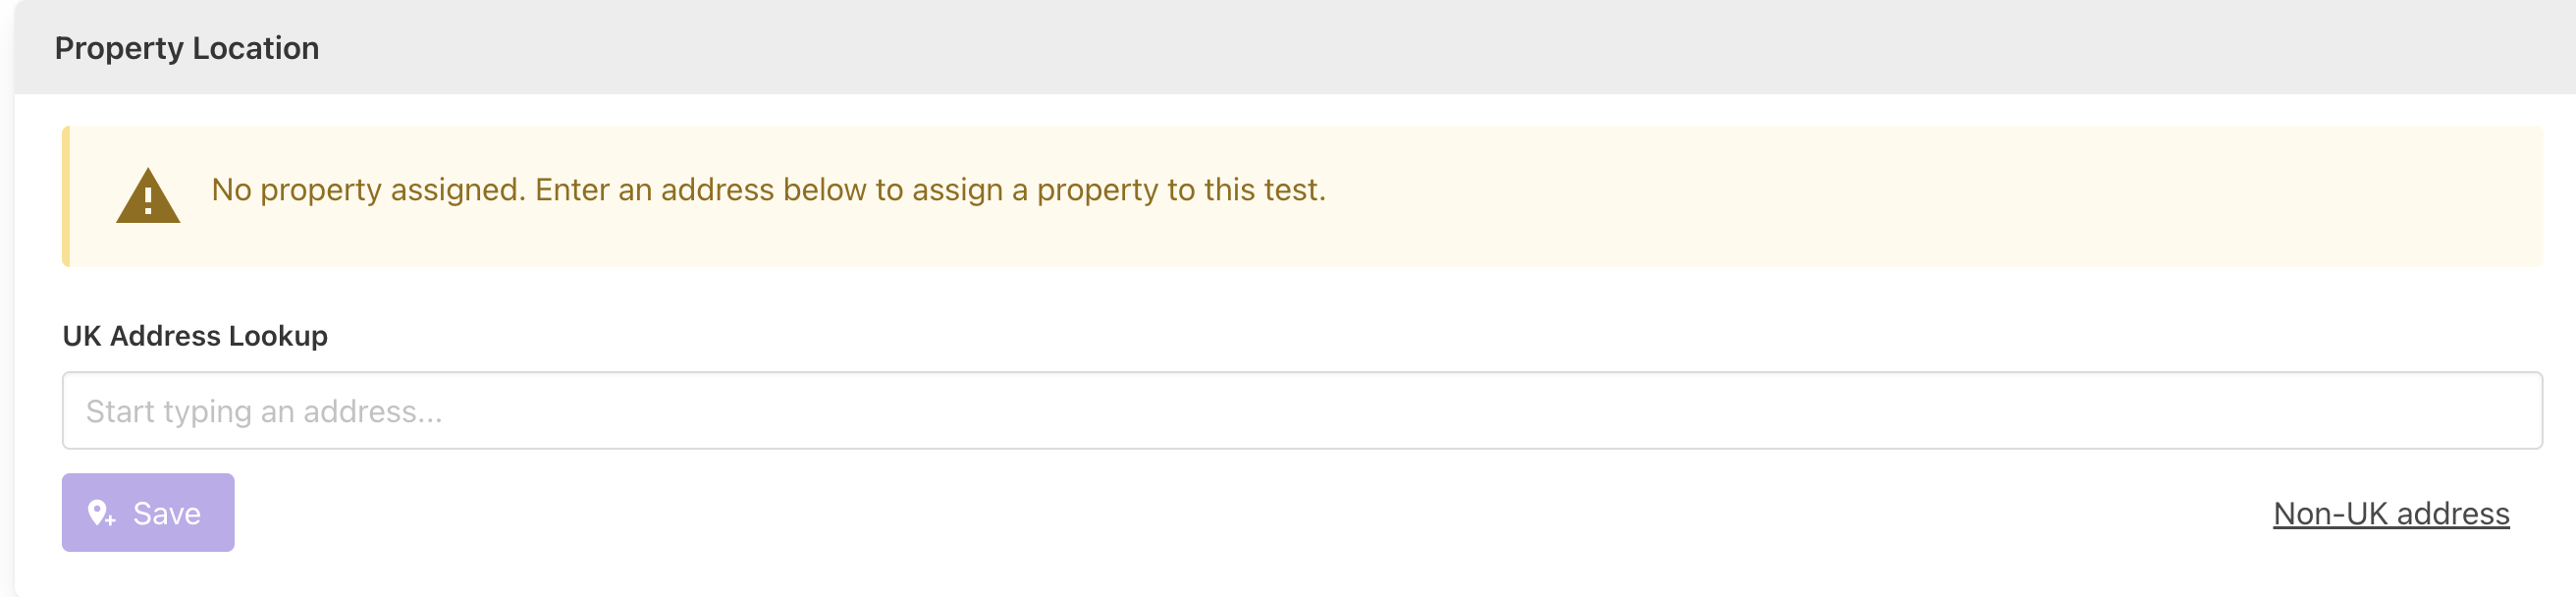
To assign an address quickly, start typing an address in the input box by entering either the postcode or house number + postcode.
A list of matching addresses will be returned and you can select the correct address from the list displayed.
### Adding a property address
If you haven't already assigned a property address to the test, you can add one by either looking up the address or manually entering an address.
A property address must be assigned before either a test report can be produced or a test certificate created via a competency scheme.
#### UK address lookup
To assign an address quickly, start typing an address in the input box by entering either the postcode or house number + postcode.
A list of matching addresses will be returned and you can select the correct address from the list displayed.
 The address lookup functionality makes use of Royal Mail’s Postcode Address File (PAF®) including the “Not Yet Built” dataset.
This is a comprehensive database of all addresses in the UK, Channel Islands and Isle of Man, and includes dwellings still under construction.
#### Manually entering an address
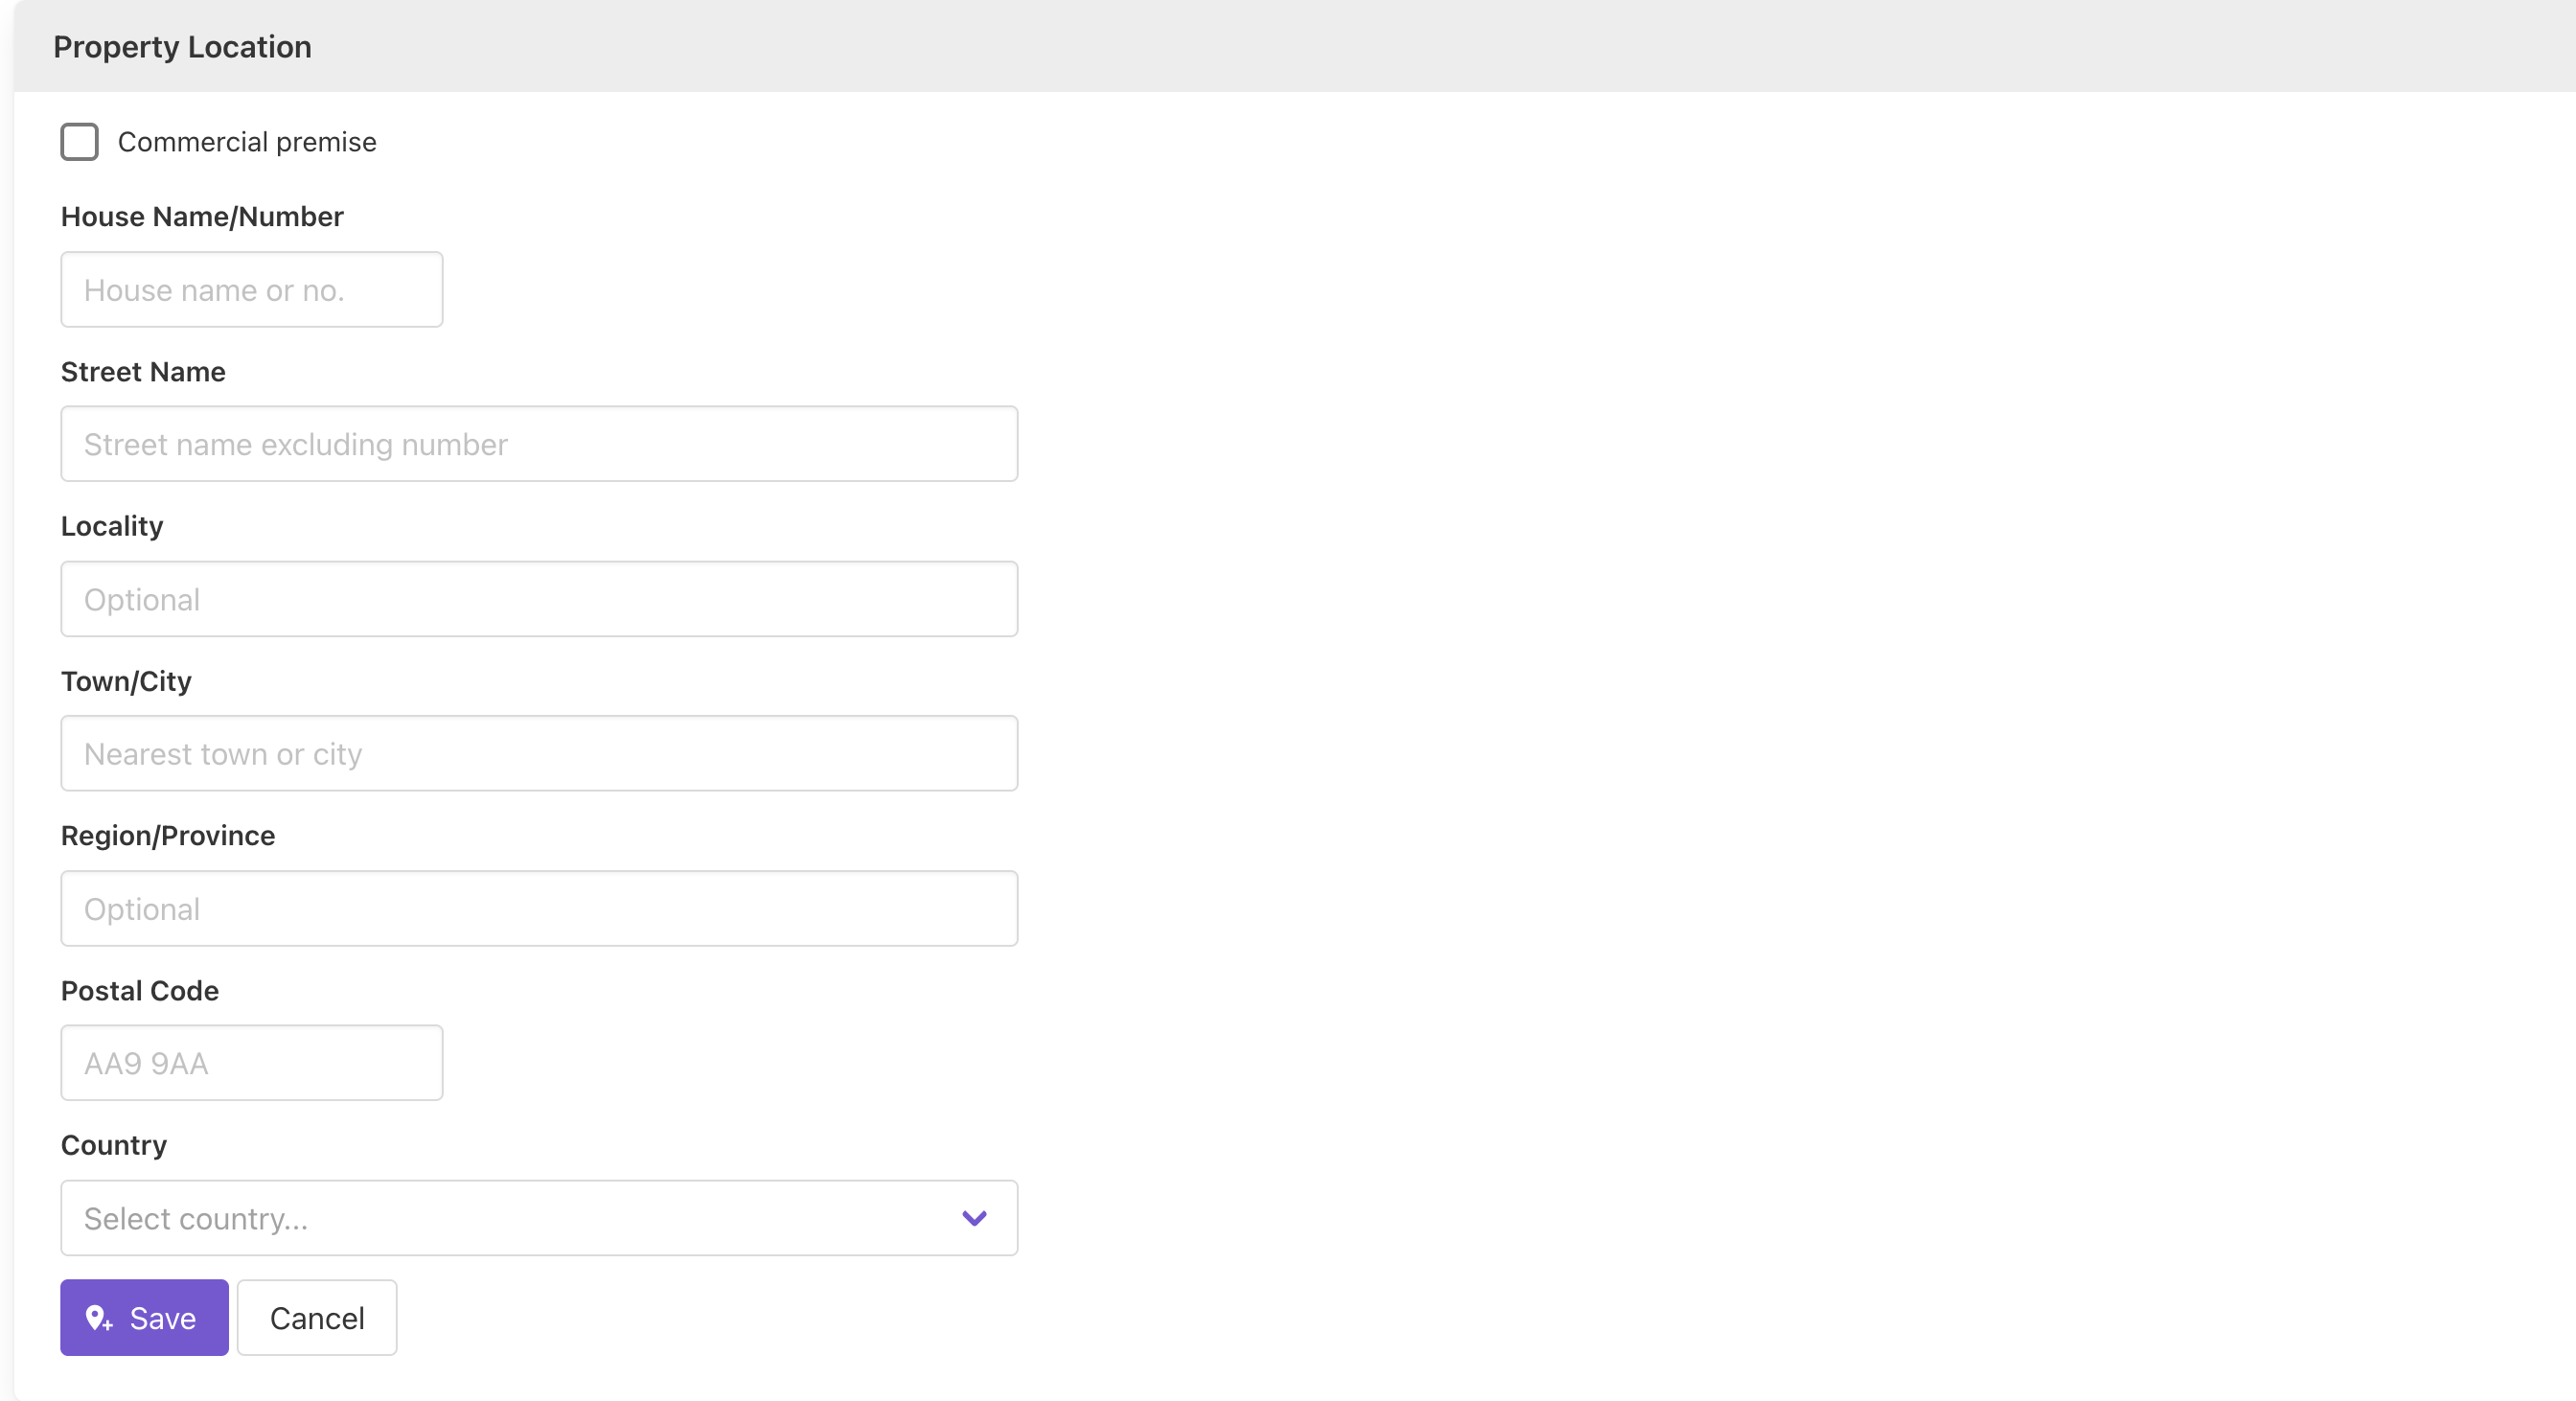
If you cannot find the address using the lookup functionality, or you are entering a non-UK address, you can manually enter the address of the property.
In the bottom right corner, click the *Non-UK Address* button and complete each of the address fields displayed.
The address lookup functionality makes use of Royal Mail’s Postcode Address File (PAF®) including the “Not Yet Built” dataset.
This is a comprehensive database of all addresses in the UK, Channel Islands and Isle of Man, and includes dwellings still under construction.
#### Manually entering an address
If you cannot find the address using the lookup functionality, or you are entering a non-UK address, you can manually enter the address of the property.
In the bottom right corner, click the *Non-UK Address* button and complete each of the address fields displayed.
 ### Managing building/room information
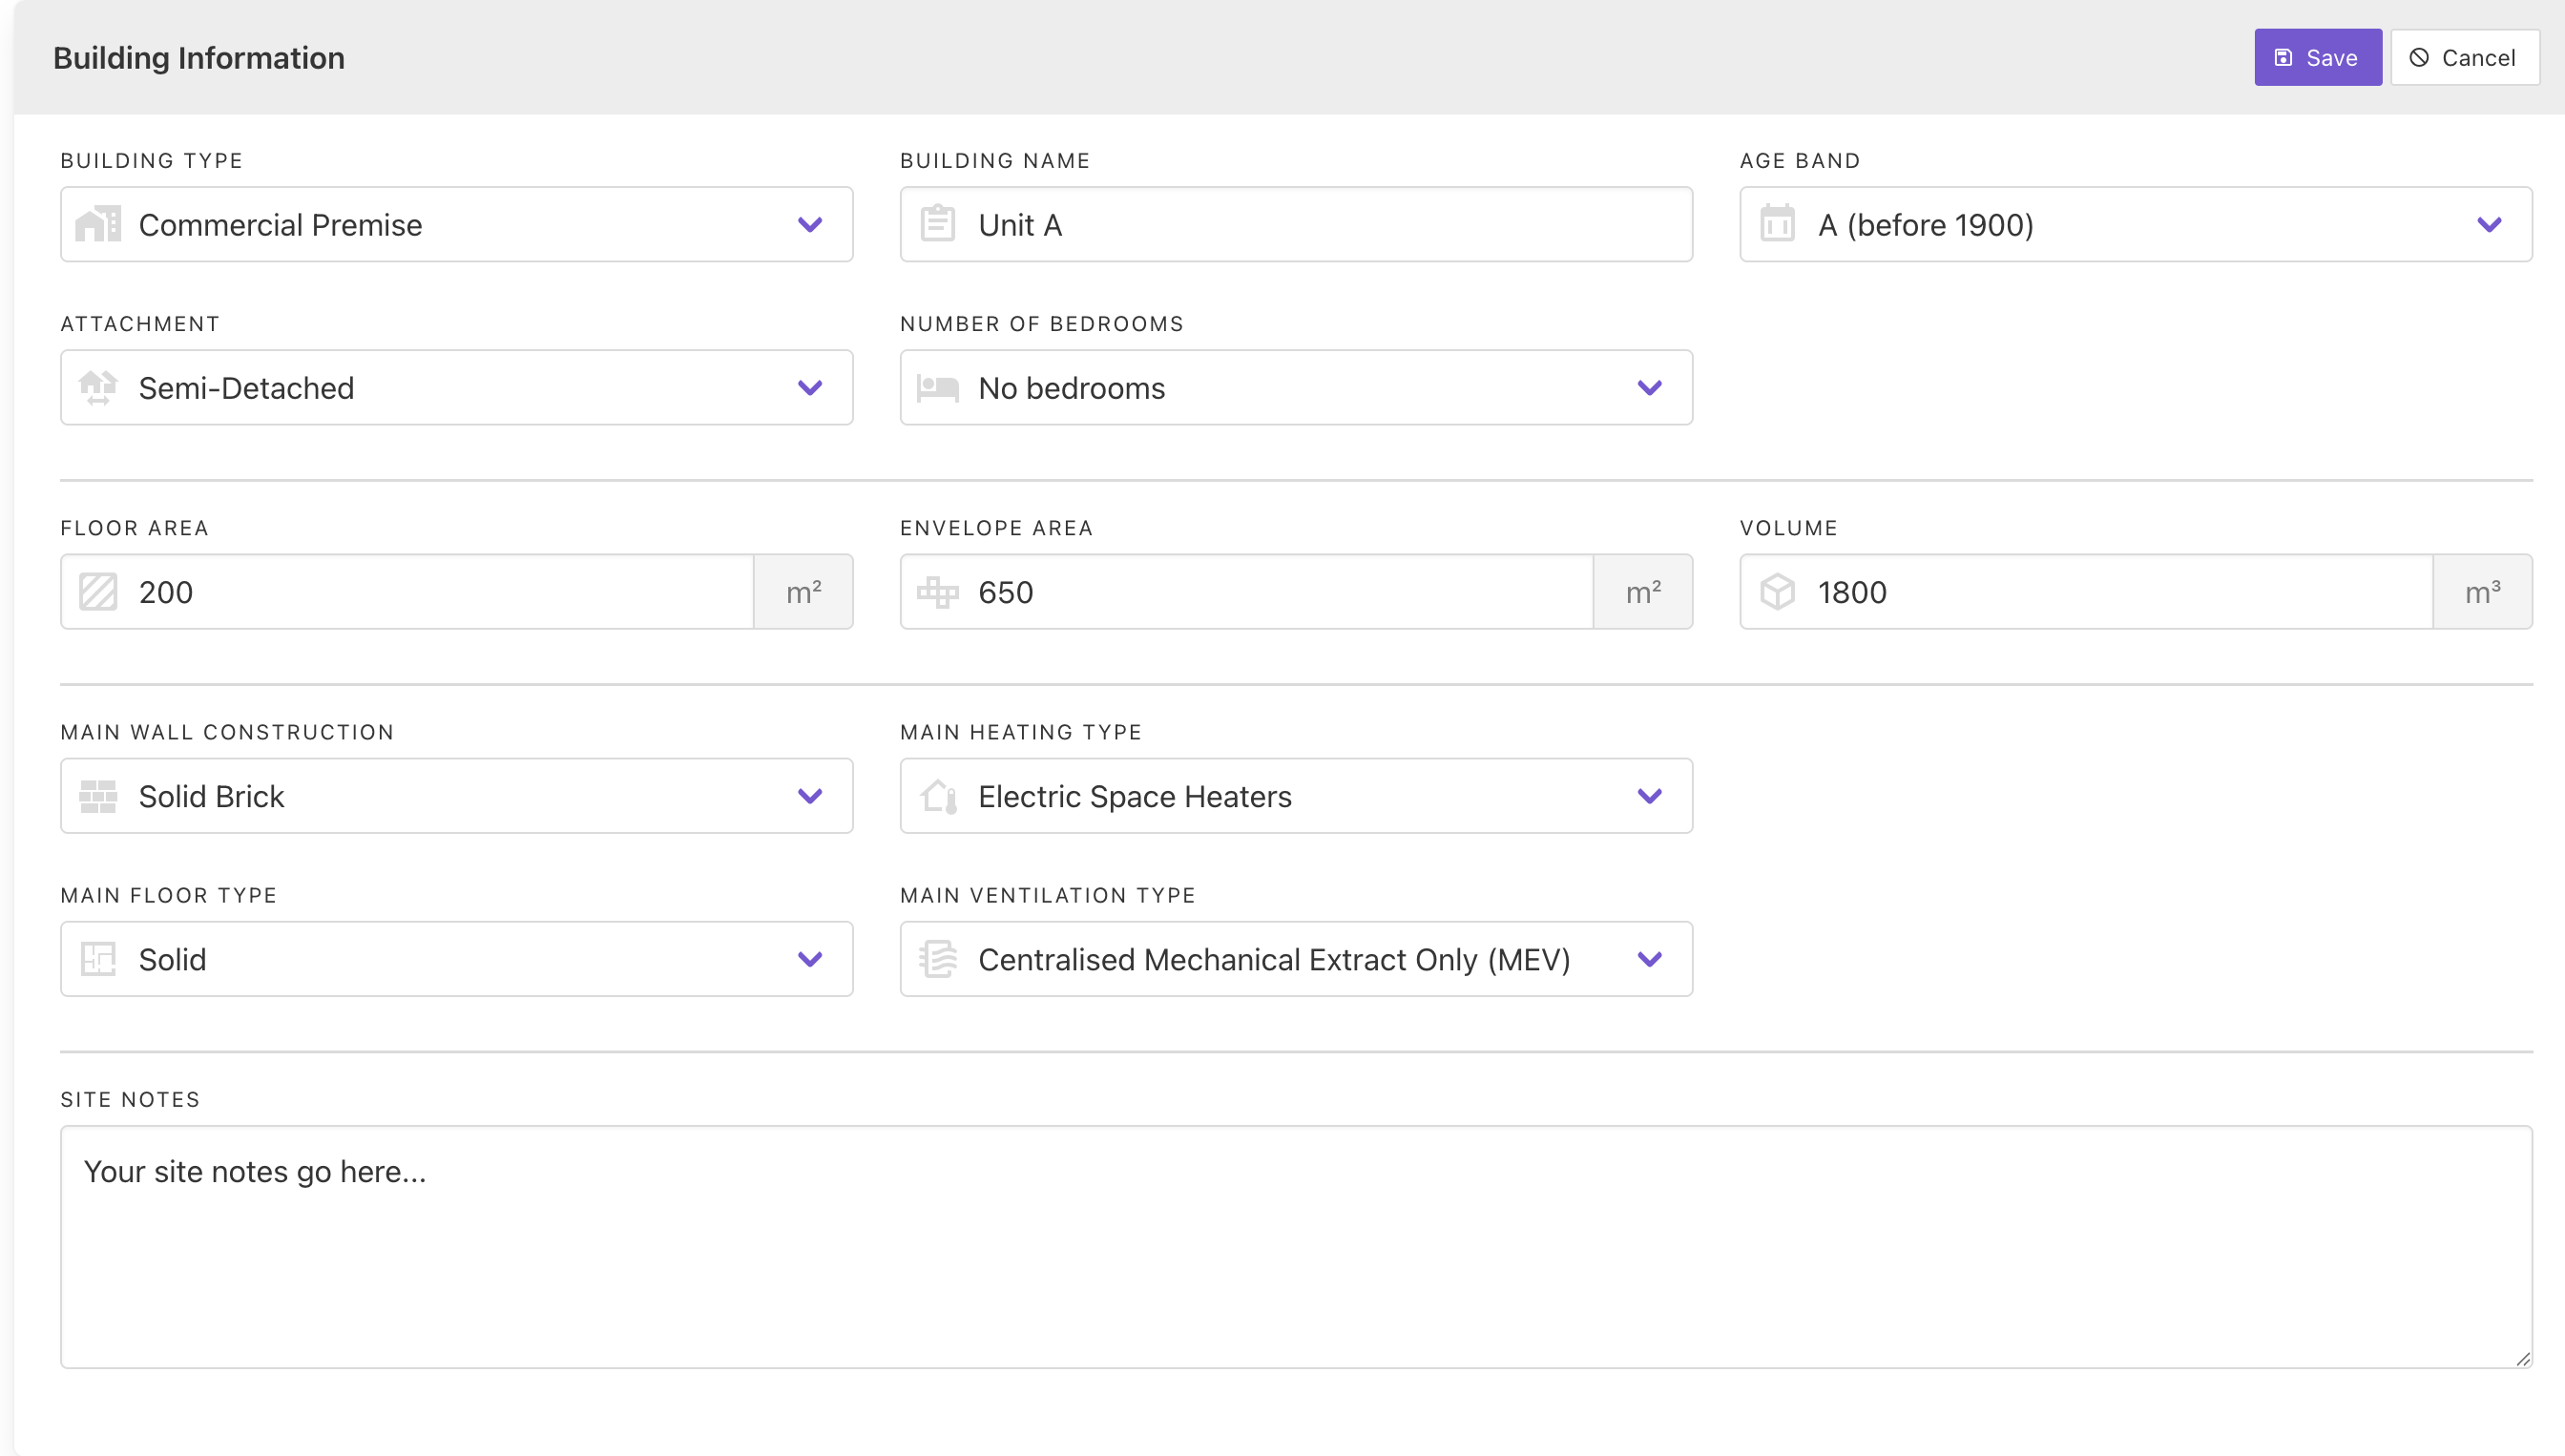
As with the *Test Context*, both *Building Information* and *Room Information* can be amended by clicking the *Edit* button in the top right corner of each respective panel.
If you make any changes to the enclosure geometry (envelope area or volume), the result will be recalculated using the new dimensions.
### Managing building/room information
As with the *Test Context*, both *Building Information* and *Room Information* can be amended by clicking the *Edit* button in the top right corner of each respective panel.
If you make any changes to the enclosure geometry (envelope area or volume), the result will be recalculated using the new dimensions.
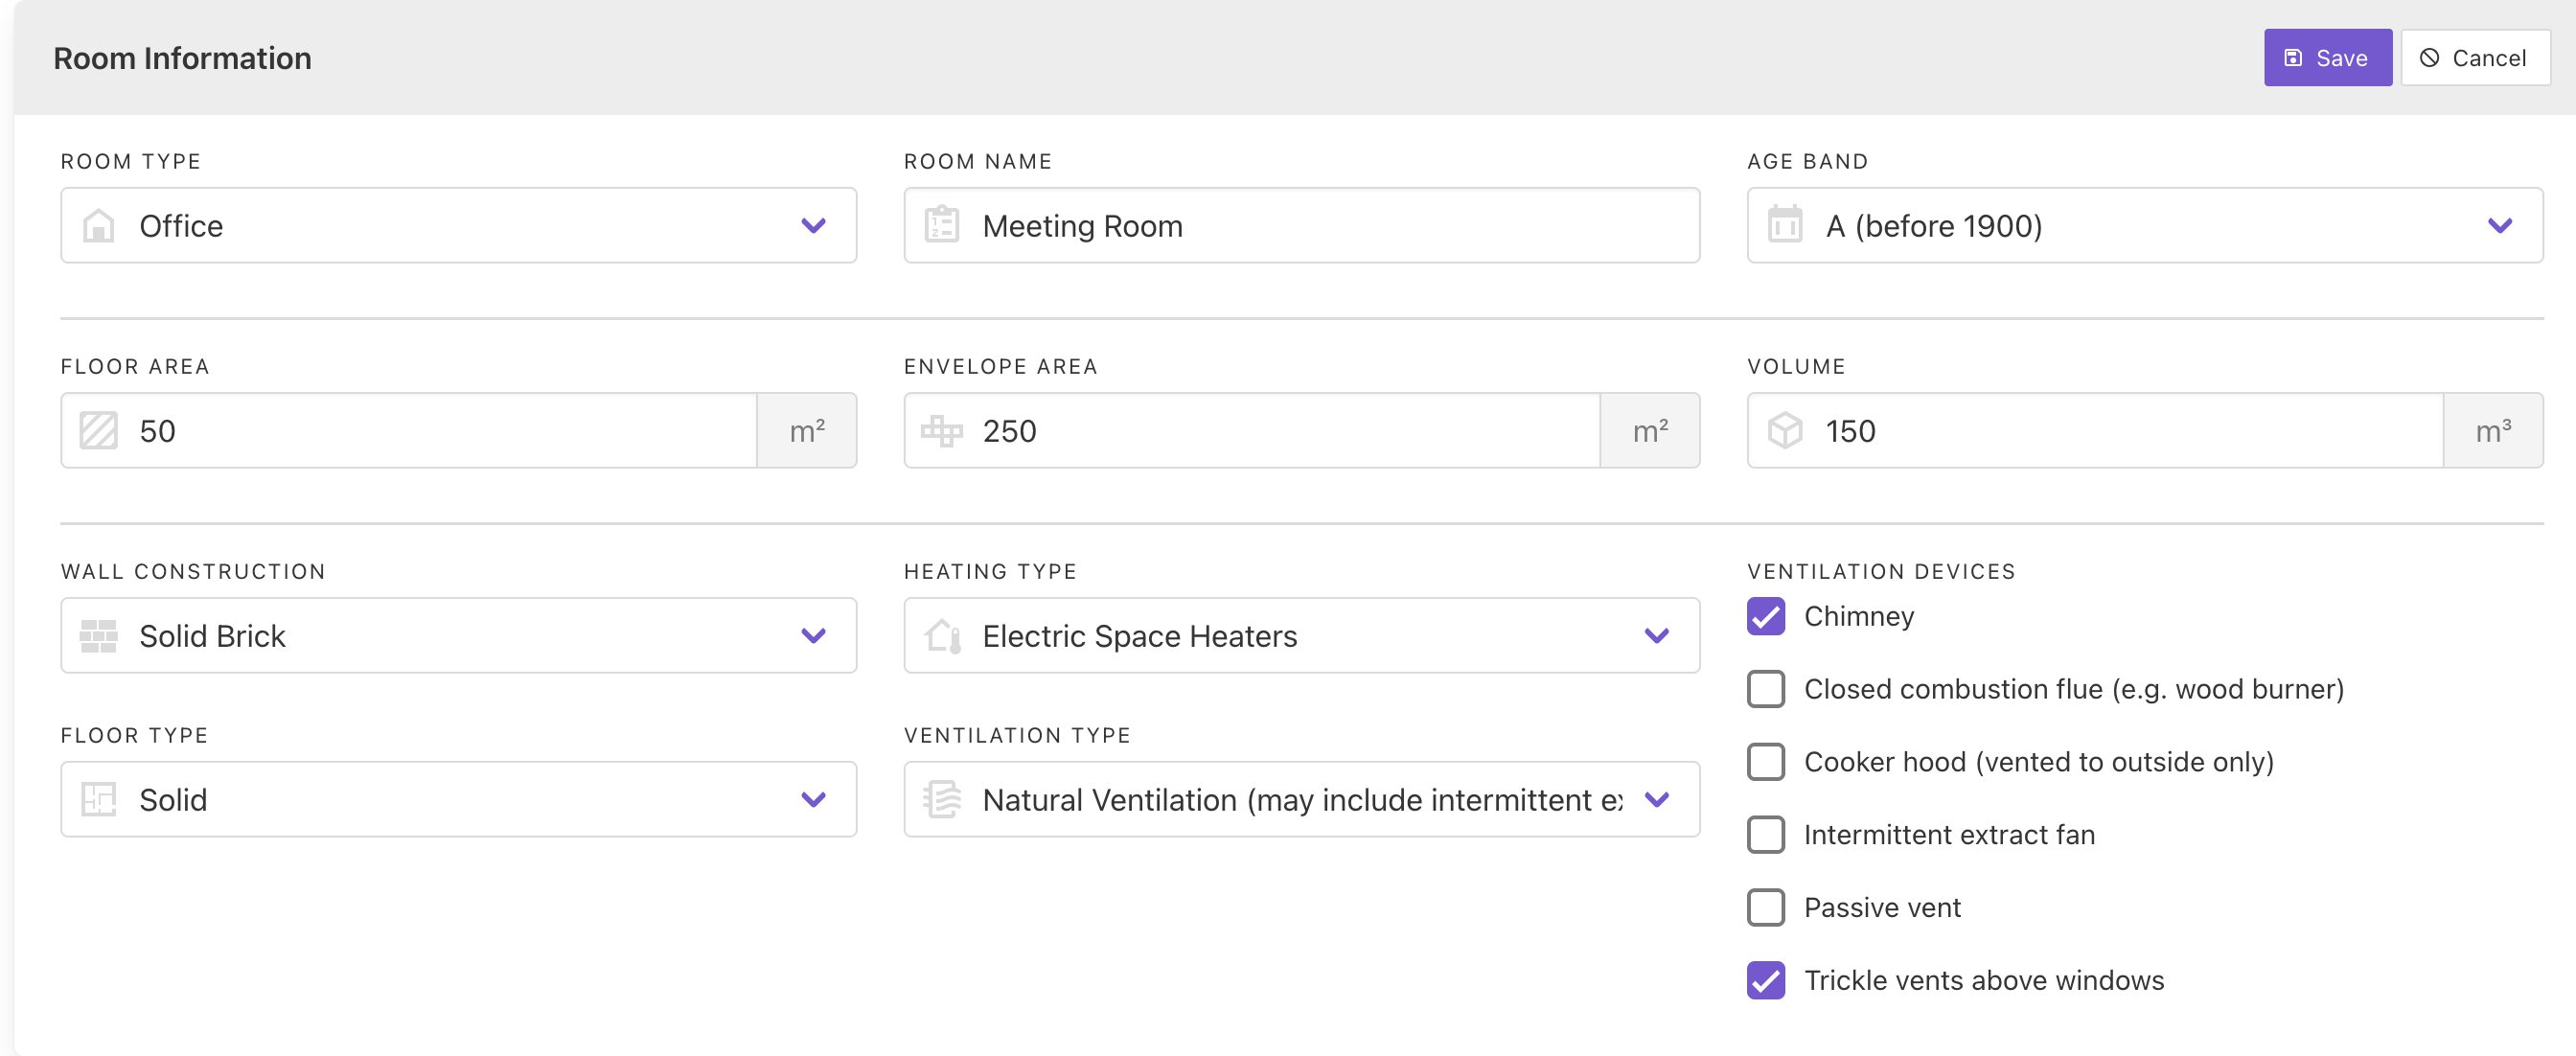 The *Room Information* panel will only be displayed when the test enclosure is set to "Room Only" within the *Test Context* panel.
## Parameters tab
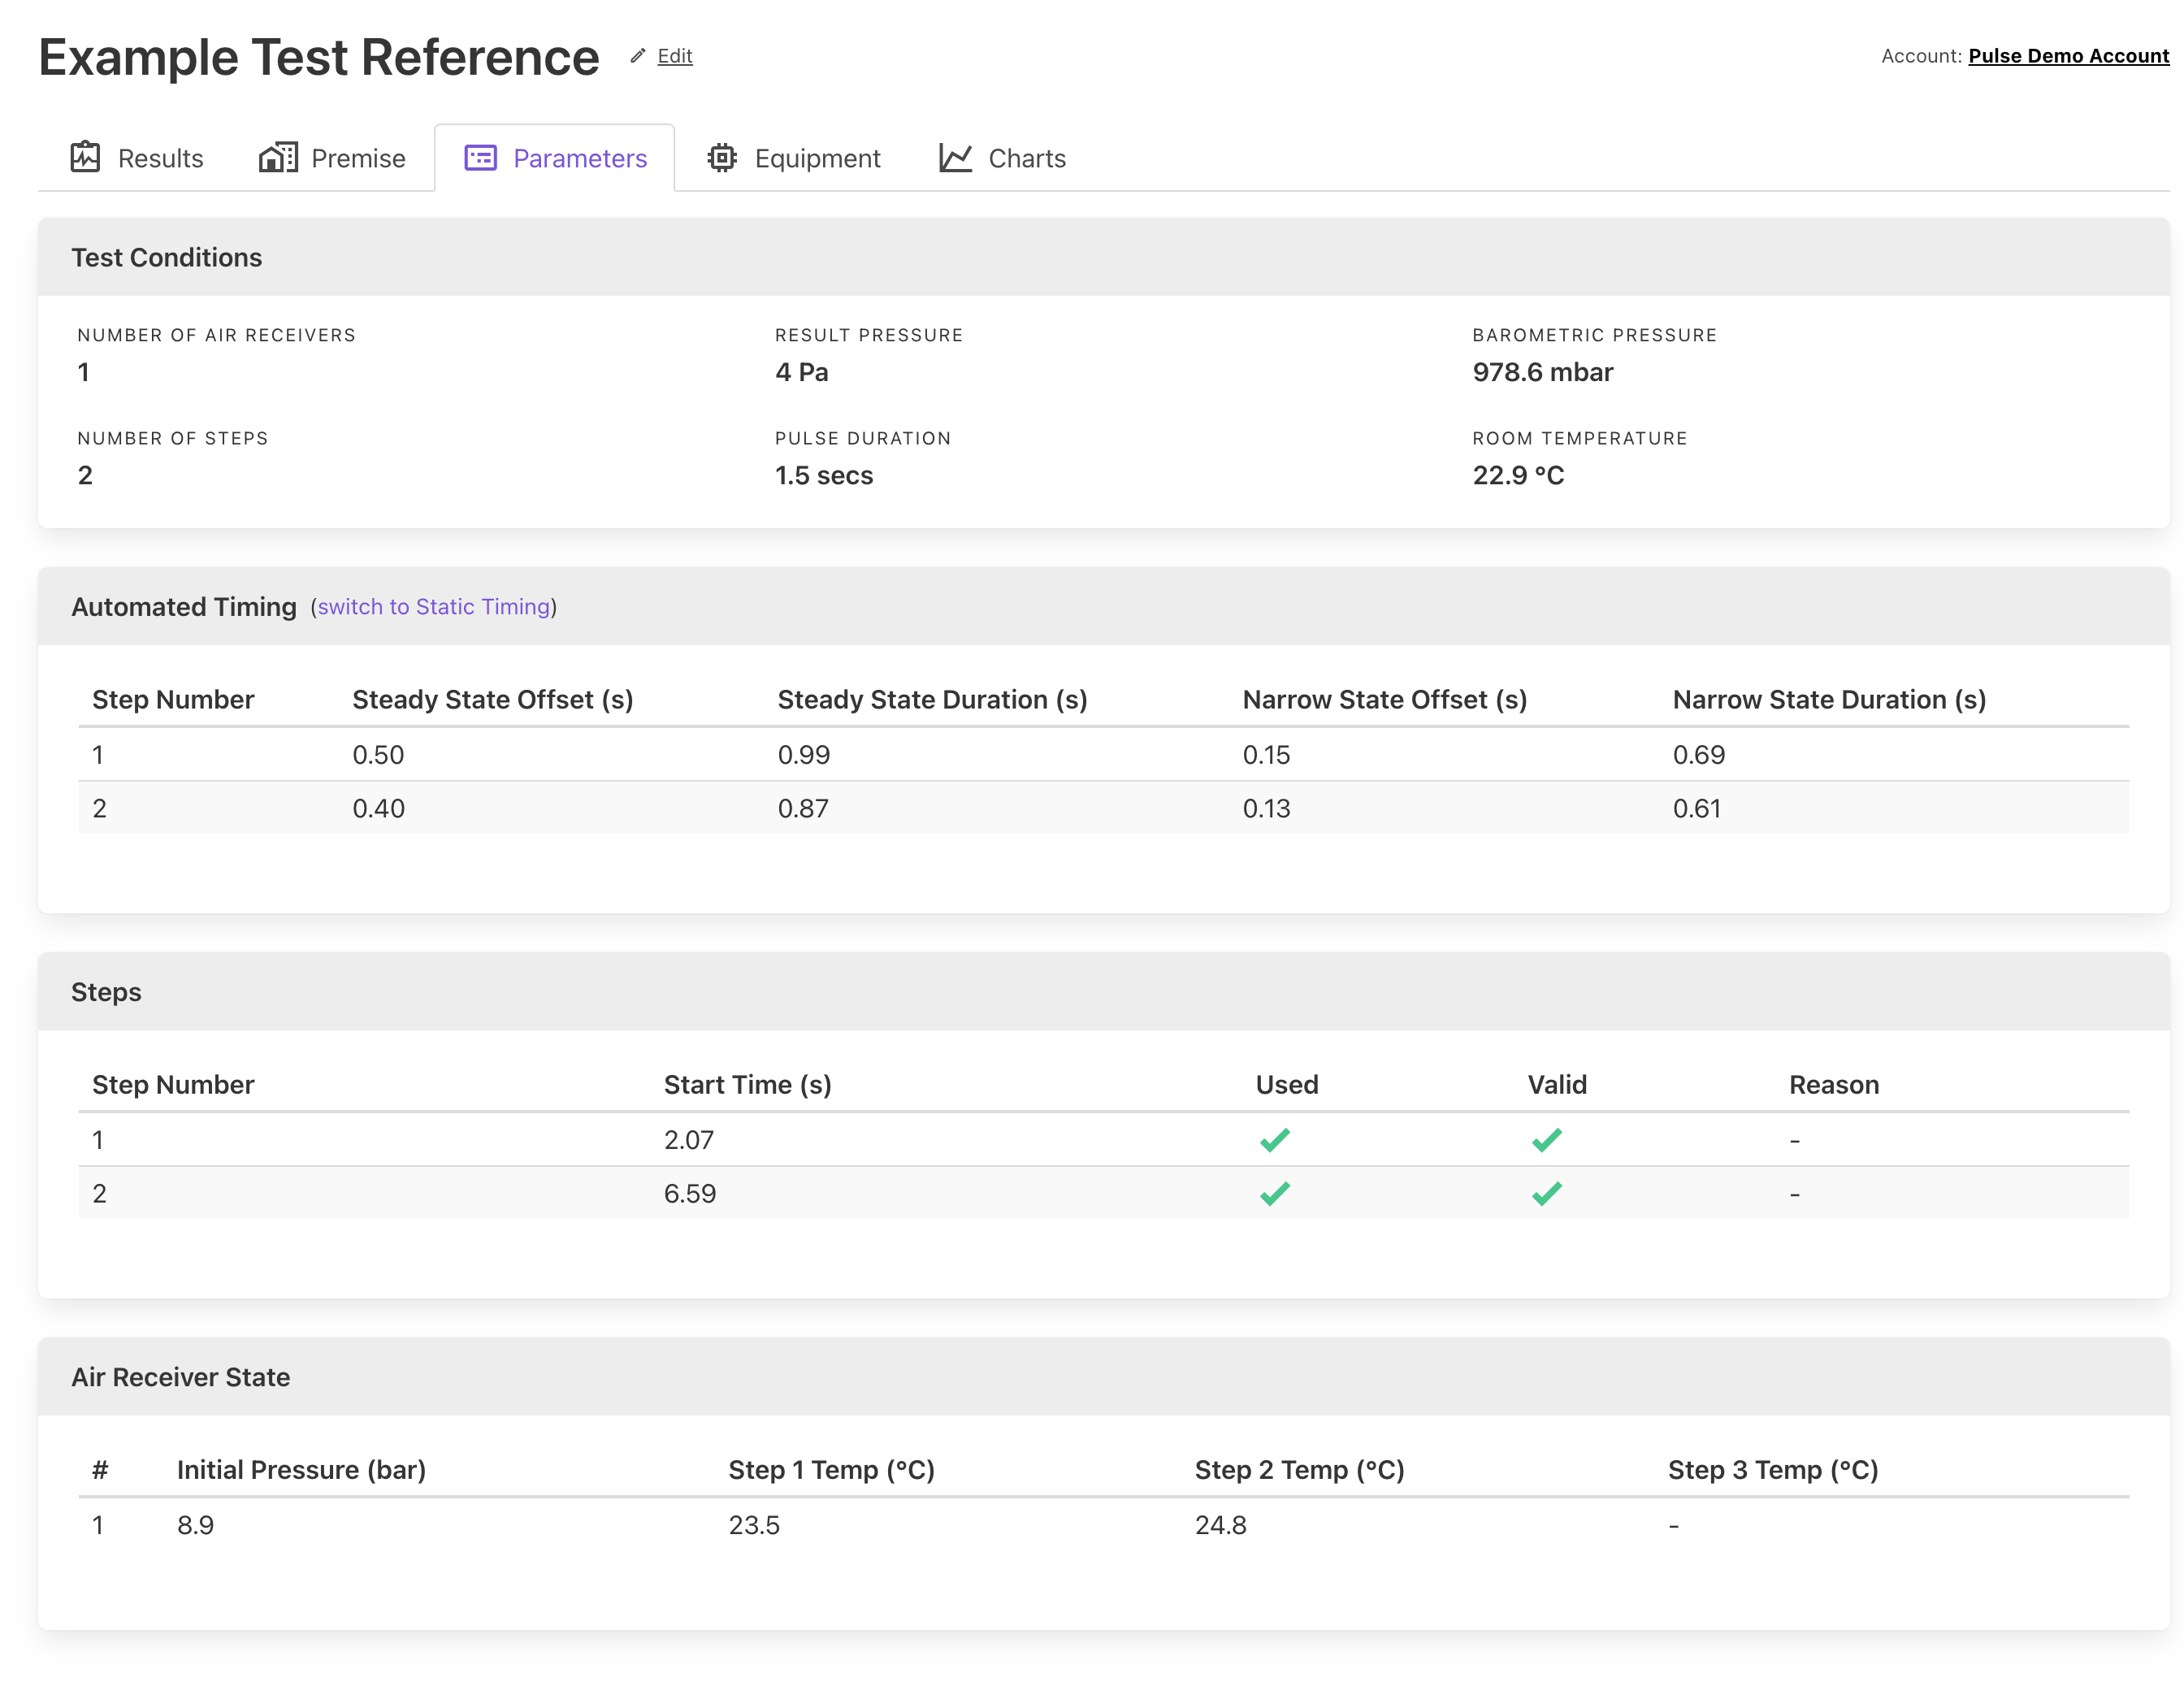
The *Parameters* tab displays the settings that were used during the test cycle as well as detailed information about the calculation process.
The *Room Information* panel will only be displayed when the test enclosure is set to "Room Only" within the *Test Context* panel.
## Parameters tab
The *Parameters* tab displays the settings that were used during the test cycle as well as detailed information about the calculation process.
 This information is designed for advanced users only.
### Configuring static timing
The Pulse data analysis algorithm will automatically select the best timing routine when calculating the result and requires no user knowledge.
Advanced users can, however, override this by using static timing for the various stages of the data analysis:
#### Steady state period
Steady state is the period over which a polynomial fit is performed to determine a smoothed curve and a derivative of the air pressure.
The *Steady State Offset* is the start of the defined steady state period, offset from the point the valve opens. This defaults to 0.5-seconds but may be manually adjusted to >= 0.3-secs.
*Steady State Duration* must be >= 0.4-secs, and the sum of the *Steady State Offset* + *Steady State Duration* must not be longer than the total valve open duration (typically 1.5-secs or 3-secs when testing more airtight enclosures).
#### Narrow state period
The *Narrow State* sits within the *Steady State* and is the period when data samples of air pressure and air leakage are collected for analysis. The sum of the *Narrow State Offset* + *Narrow State Duration* must be less than the *Steady State Duration*.
## Equipment tab
The *Equipment* tab displays information about the controller and air receivers that were used for the test.
This information is designed for advanced users only.
### Configuring static timing
The Pulse data analysis algorithm will automatically select the best timing routine when calculating the result and requires no user knowledge.
Advanced users can, however, override this by using static timing for the various stages of the data analysis:
#### Steady state period
Steady state is the period over which a polynomial fit is performed to determine a smoothed curve and a derivative of the air pressure.
The *Steady State Offset* is the start of the defined steady state period, offset from the point the valve opens. This defaults to 0.5-seconds but may be manually adjusted to >= 0.3-secs.
*Steady State Duration* must be >= 0.4-secs, and the sum of the *Steady State Offset* + *Steady State Duration* must not be longer than the total valve open duration (typically 1.5-secs or 3-secs when testing more airtight enclosures).
#### Narrow state period
The *Narrow State* sits within the *Steady State* and is the period when data samples of air pressure and air leakage are collected for analysis. The sum of the *Narrow State Offset* + *Narrow State Duration* must be less than the *Steady State Duration*.
## Equipment tab
The *Equipment* tab displays information about the controller and air receivers that were used for the test.
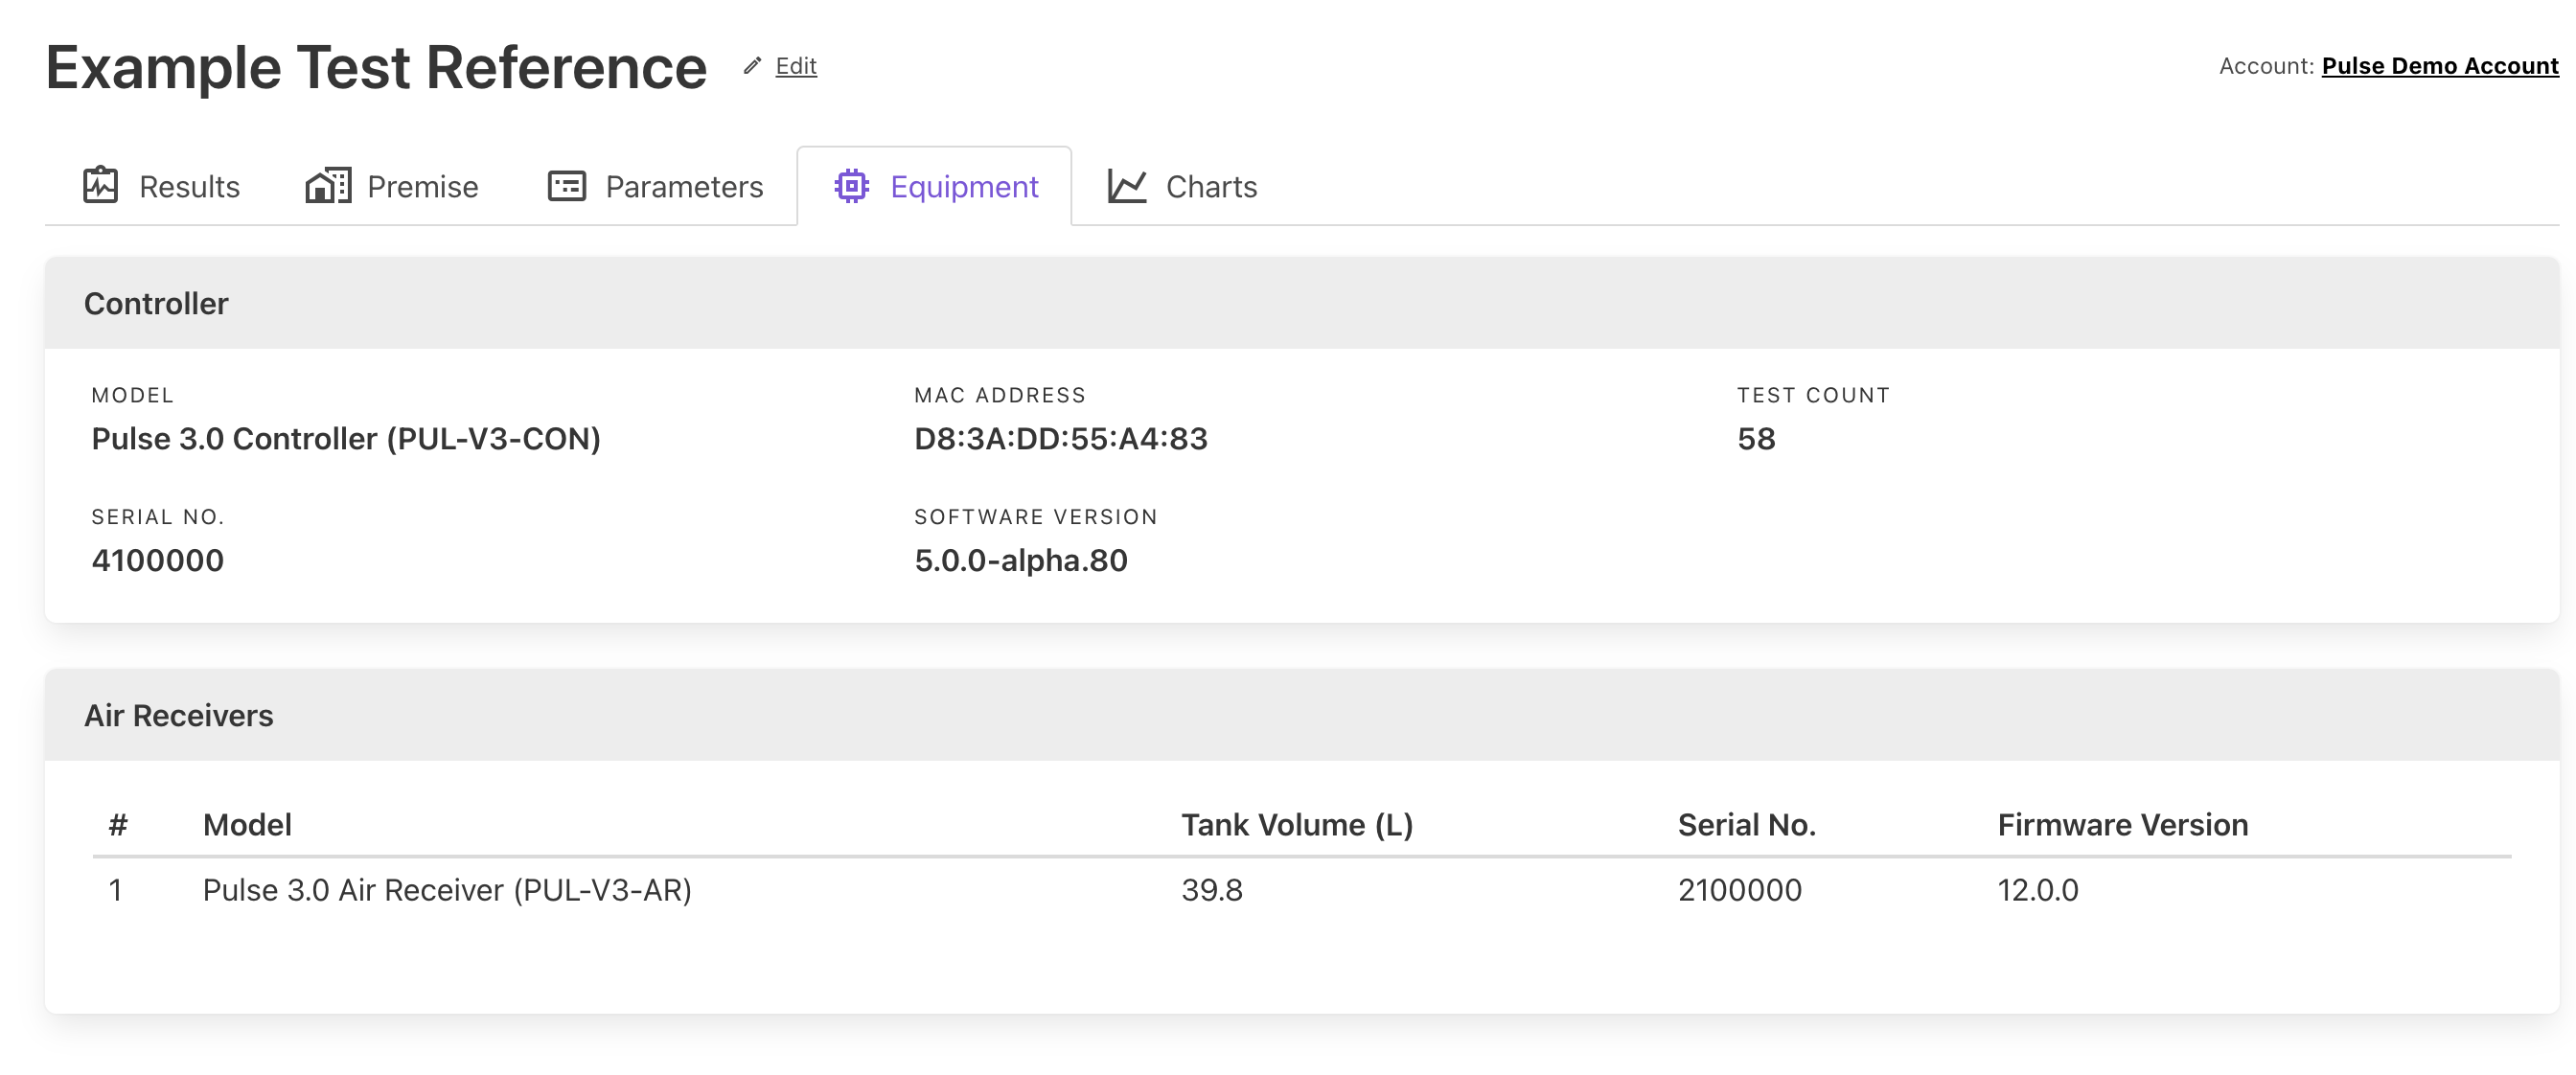 When producing a test certificate via a competency scheme, the serial numbers of the equipment will be checked to make sure they have been serviced and calibrated recently.
## Charts tab
The *Charts* tab displays a visual representation of the Pulse test cycle and measurements recorded.
Refer to the Pressure Charts page for more information on each chart.
When producing a test certificate via a competency scheme, the serial numbers of the equipment will be checked to make sure they have been serviced and calibrated recently.
## Charts tab
The *Charts* tab displays a visual representation of the Pulse test cycle and measurements recorded.
Refer to the Pressure Charts page for more information on each chart.