> ## Documentation Index
> Fetch the complete documentation index at: https://docs.pulseairtest.com/llms.txt
> Use this file to discover all available pages before exploring further.
# Home screen
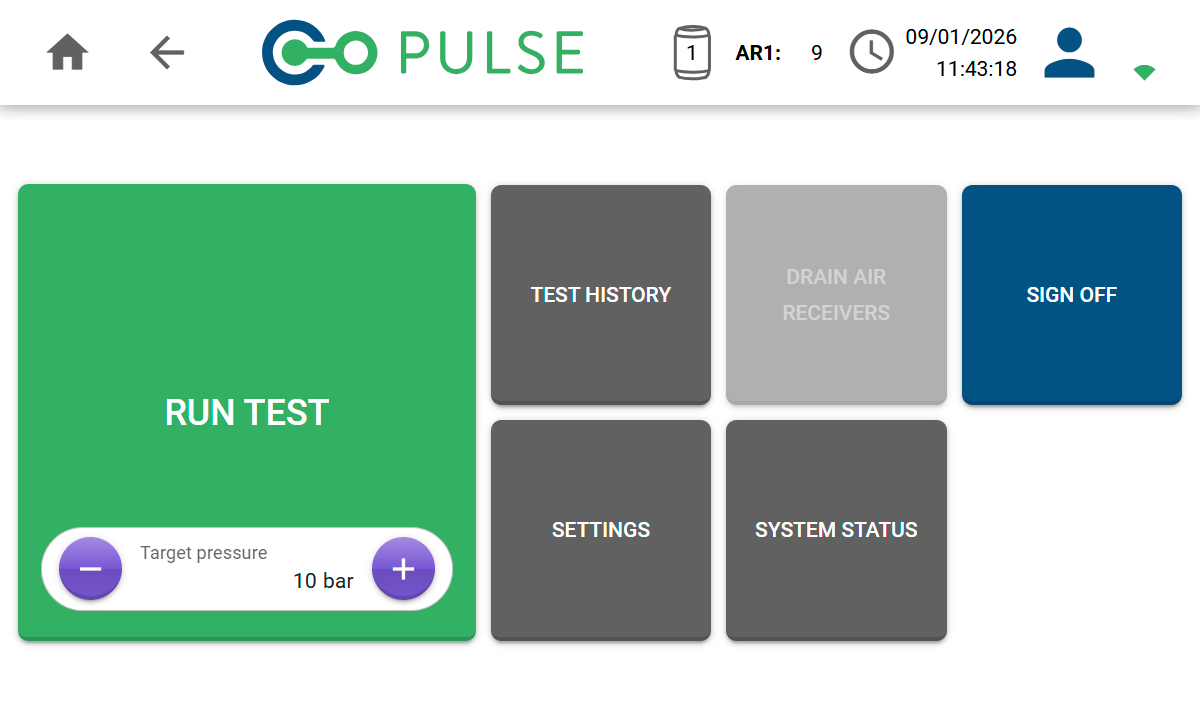
The *Home* screen is the central hub of the user interface. From here, you can start a new Pulse test, view existing test results, change settings and view the status of any connected air receivers.
 ## Functionality
Start a new Pulse test by clicking the *Run Test* button. You will be required to enter information about the building before starting the test cycle.
The *Test History* button allows you to view existing test results, as well as upload them to your cloud account or export them to a USB flash drive.
If you have any old Pulse 2.0 air receivers connected, the *Drain ARs* button allows you to empty any remaining compressed air from them for transport and storage purposes.
Enter the *Settings* area to adjust controller settings, connect to or disconnect from WiFi networks, and manage users and accounts.
Use the *System Status* button to view information about the controller and any connected air receivers.
When you have finished using the controller, click the *Sign Off* button to switch to a different user or log out completely and return to the *Login* screen.
## Setting the target pressure
The *Run test* button contains an embedded target pressure selector. This allows you to set the initial charge pressure that all connected air receivers are filled to.
Use the + and - buttons to adjust the value to your desired test pressure.
## Functionality
Start a new Pulse test by clicking the *Run Test* button. You will be required to enter information about the building before starting the test cycle.
The *Test History* button allows you to view existing test results, as well as upload them to your cloud account or export them to a USB flash drive.
If you have any old Pulse 2.0 air receivers connected, the *Drain ARs* button allows you to empty any remaining compressed air from them for transport and storage purposes.
Enter the *Settings* area to adjust controller settings, connect to or disconnect from WiFi networks, and manage users and accounts.
Use the *System Status* button to view information about the controller and any connected air receivers.
When you have finished using the controller, click the *Sign Off* button to switch to a different user or log out completely and return to the *Login* screen.
## Setting the target pressure
The *Run test* button contains an embedded target pressure selector. This allows you to set the initial charge pressure that all connected air receivers are filled to.
Use the + and - buttons to adjust the value to your desired test pressure.